To clean a Bissell Carpet Cleaner, first, unplug the machine and remove the water tanks. Next, dismantle the nozzle and front floor nozzle to access the brush rolls.
Maintaining a Bissell Carpet Cleaner is key to its performance and longevity. Regular cleaning ensures that your machine works efficiently, keeping your carpets fresh and extending the cleaner’s life. Tackling the task of disassembling your carpet cleaner may seem daunting, but it’s a straightforward process that can be done with minimal tools.
By following the manufacturer’s guidelines, you can take apart the necessary components for a thorough cleaning. This routine maintenance not only contributes to the effectiveness of your cleaning sessions but also prevents the buildup of dirt and debris that can damage the machine over time. Remember to always consult your specific model’s manual for detailed instructions, as the disassembly process can vary slightly between models.
Credit: m.youtube.com
Introduction To Bissell Carpet Cleaner Maintenance
Maintaining your Bissell Carpet Cleaner is key to its longevity and performance. Regular cleaning ensures your machine works effectively. Dirt and debris can affect its functionality. Taking it apart for a thorough clean is essential. This guide makes maintenance easy and straightforward.
Importance Of Regular Cleaning
Regular cleaning maintains your cleaner’s efficiency. It prevents build-up that can cause damage. A well-maintained machine provides consistent results and extends its lifespan. Your carpets stay cleaner, for longer.
- Prevents clogs and malfunctions
- Ensures optimal suction and cleaning power
- Keeps your cleaner smelling fresh
Safety Precautions Before Dismantling
Before you start, safety comes first. Always unplug your Bissell Carpet Cleaner. Check that the machine is completely powered off. Wear gloves to protect your hands. Keep your workspace clean and dry. These steps prevent accidents and damage to your cleaner.
| Step | Action |
|---|---|
| 1 | Unplug the machine |
| 2 | Check for power |
| 3 | Prepare your space |
Identifying Your Bissell Model
Before diving into the maintenance of your Bissell carpet cleaner, knowing the exact model is crucial. Different models have unique features and parts. Let’s identify your Bissell model to ensure you can clean it properly and safely.
Types Of Bissell Carpet Cleaners
Bissell offers a range of carpet cleaners to suit various cleaning needs. Upright cleaners are great for large areas. Portable cleaners target small spills and stains. Canister cleaners provide flexibility with a separate cleaning wand.
Locating The Model Number
Finding your model number is easy. Look for a silver sticker on your Bissell carpet cleaner. This sticker is often on the bottom or back of the unit. The model number is clearly marked and essential for getting the right cleaning instructions.
| Location | Details |
|---|---|
| Bottom of Unit | Flip the cleaner over and look for a sticker. |
| Back of Unit | Check near the base, above the rear wheels. |
Tools Needed For Disassembly
Before diving into the maintenance task of cleaning your Bissell Carpet Cleaner, ensure you have the right tools for disassembly. This step is crucial for a thorough clean and to prevent damage to your machine. Let’s break down the tools you’ll need.
Basic Household Tools
Gather common tools found in most homes. These will assist in the initial steps of taking apart your carpet cleaner:
- Screwdriver Set: A variety of sizes and heads (Phillips and flat) to remove screws.
- Pliers: Useful for gripping and pulling parts that may be tightly fitted.
- Utility Knife: For cutting away tangled hair and debris.
- Scissors: To snip threads or fibers caught in the brushes.
- Bucket and Cloth: For cleaning parts as you go.
Specialty Tools For Specific Models
Certain Bissell models may require specialized tools. Check your user manual and see if these apply:
- Torx Screwdrivers: Some models have Torx screws, so a set of Torx screwdrivers is necessary.
- Allen Wrenches: Certain fasteners may need an Allen wrench to remove.
- Belt Changing Tool: This tool helps remove and replace belts without damage.
Once all tools are ready, lay out a clean workspace and organize your tools for easy access. You’re set to start the cleaning process!

Credit: www.bissell.com
Preparation Steps
Keeping your Bissell carpet cleaner in top condition means taking it apart for a thorough cleaning. Proper preparation ensures a smooth process. Follow these steps to get started:
Unplugging And Emptying The Machine
- Turn off the carpet cleaner.
- Unplug the power cord from the outlet.
- Remove any water tanks and empty them.
Surface Cleaning Before Disassembly
- Wipe down the machine with a damp cloth.
- Clean off dirt and debris from the outside.
- Ensure the exterior is dry before disassembling.
Removing The Water Tanks
Maintaining a Bissell Carpet Cleaner involves regular cleaning. The water tanks need special attention. Follow these steps to ensure a deep clean and effective performance.
Detaching The Clean Water Tank
To start, turn off and unplug your carpet cleaner. Find the clean water tank, usually located at the top or back. Release any latches or buttons that secure the tank. Gently lift the tank away from the unit. Be sure to handle with care to avoid spills.
Emptying And Rinsing The Dirty Water Tank
Next, remove the dirty water tank. Press the release button and pull the tank out. Empty the contents into a sink. Rinse the tank with warm water. Shake out excess water and leave it to air dry before reassembling.
| Step | Action | Tip |
|---|---|---|
| 1 | Unplug and turn off | Ensure safety first |
| 2 | Release tank latches | Avoid forceful pulling |
| 3 | Lift tank away | Use both hands |
| 4 | Empty dirty water | Do this near a sink |
| 5 | Rinse with warm water | Dislodge debris |
| 6 | Air dry all parts | Prevent mildew growth |
- Always empty tanks after use.
- Check for damage or cracks regularly.
- Replace parts if needed.
Taking Apart The Main Body
Cleaning a Bissell Carpet Cleaner starts with disassembly. The main body includes critical components. This guide explains the step-by-step process. It’s crucial to follow instructions to avoid damage. Let’s dive into accessing the internal parts.
Accessing The Internal Components
Begin by unplugging the cleaner. Safety comes first. Remove the water tanks next. They usually lift off or unclip. Find screws securing the main body. A screwdriver will be needed. Remove these screws carefully. Note their locations for reassembly. Gently pull apart the plastic casing. You now have access to the internal components.
- Unplug the cleaner
- Take off water tanks
- Unscrew the main body
- Keep track of screw locations
- Separate plastic housing
Careful Handling Of The Motor And Pumps
The motor and pumps are sensitive. Handle with care. Avoid touching electrical parts. Use a dry cloth for cleaning. Do not submerge in water. Reassemble by reversing the steps. Ensure all components are dry. Check for proper alignment. Secure screws back in place. Proper maintenance ensures longevity.
- Handle motor and pumps gently
- Clean with a dry cloth
- Do not use water
- Align parts correctly when reassembling
- Tighten screws appropriately
Regular maintenance keeps your Bissell Carpet Cleaner running smoothly. Taking apart the main body is straightforward. Always handle with care, especially the motor and pumps. Follow these steps for a thorough clean.
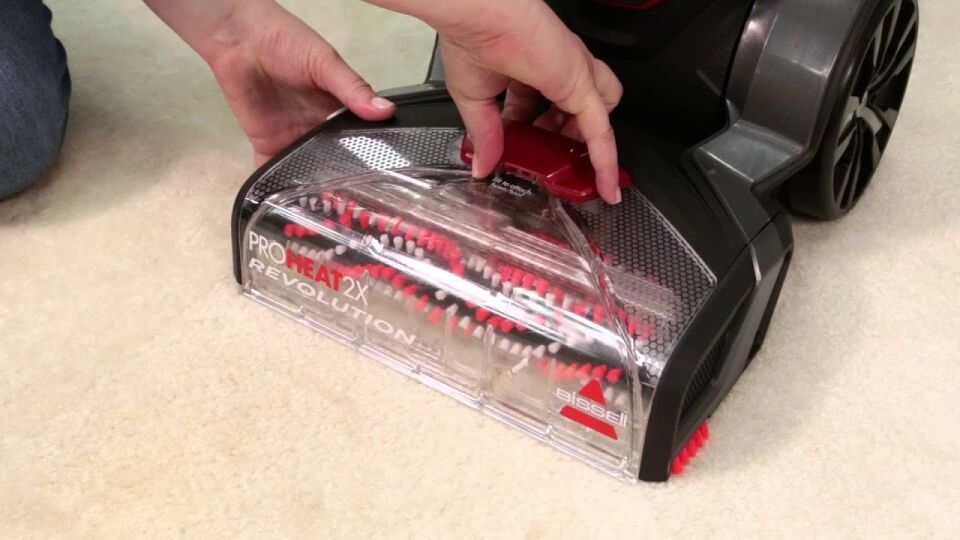
Cleaning The Brush Roll And Nozzle
Maintaining a clean and efficient Bissell Carpet Cleaner is essential for optimal performance. The brush roll and nozzle are crucial parts that often need attention. Regular cleaning can prevent clogs and ensure deep cleaning of carpets. Let’s dive into the steps to keep these components in top condition.
Removing Hair And Debris
Start by unplugging the carpet cleaner. Carefully remove the brush roll cover. Take out the brush roll. Slide off any hair and debris that has wrapped around the brush. Use scissors for stubborn tangles. Remember to clear the brush ends as well. This keeps the brush spinning smoothly.
Washing And Drying Best Practices
Once the brush roll is hair-free, wash it with warm water. Use a mild detergent if needed. Rinse thoroughly. Allow the brush roll to air dry completely before reinserting. This prevents mold and odors. The nozzle can be wiped down with a damp cloth. Check for blockages and rinse under running water.
Remember:
- Never submerge the entire unit in water.
- Avoid using harsh chemicals.
- Ensure all parts are dry before reassembling.

Credit: www.wikihow.com
Reassembling Your Bissell Carpet Cleaner
After a thorough cleaning, putting your Bissell Carpet Cleaner back together is the next step. A correct assembly ensures your cleaner works like new. Follow these straightforward steps to reassemble your carpet cleaner with ease.
Step-by-step Assembly Guide
- Attach the Lower Handle: Slide the lower handle into the base. Secure with screws provided.
- Connect the Upper Handle: Align the upper handle with the lower handle. Click it into place.
- Insert the Clean Water Tank: Fill the tank with water and formula. Place it back in the cleaner.
- Set the Dirty Water Tank: Ensure the tank is clean. Position it on the base until it clicks.
- Reattach the Nozzle: Line up the nozzle at the front. Press firmly to snap it on.
- Check the Brushes: Make sure the brushes spin freely. Reinstall if necessary.
- Place the Hose: Wind the flex hose around the hooks. Secure with clips.
- Attach Accessories: Put the tools on their holders. Ensure they’re snug and secure.
Ensuring Proper Function Post-assembly
- Test the Machine: Plug in and power on. Listen for any unusual noises.
- Check for Leaks: After running, inspect for water leaks. Tighten any loose parts.
- Inspect the Brushes: Turn off and unplug. Brushes should spin without hindrance.
- Verify Suction: Use on a small area. Suction should be strong and consistent.
- Confirm Tool Function: Attach a tool. Ensure it operates correctly.
By following these steps, your Bissell Carpet Cleaner will be ready for effective cleaning.
Maintenance Tips To Prevent Future Buildup
Keeping your Bissell Carpet Cleaner in top condition requires regular maintenance. By following a few simple tips, you can prevent future buildup and ensure your machine always performs its best. Let’s dive into some essential maintenance tips.
Regular Cleaning Schedule
Stick to a cleaning routine to keep your Bissell Carpet Cleaner in top shape. After each use, remove dirt and debris from the brushes and tanks.
- Rinse out the dirty water tank with warm water.
- Clean the nozzle and brushes with a mild detergent.
- Check filters and wash or replace them as needed.
- Let all parts air-dry completely before reassembling.
Monthly, deep clean the machine parts that come in contact with water. Use a vinegar solution to dissolve mineral buildup.
Proper Storage Solutions
Correct storage of your Bissell Carpet Cleaner extends its life and prevents mold growth. Follow these steps:
- Store in a dry, cool place to avoid humidity.
- Keep upright to prevent leaks and protect the motor.
- Ensure all parts are dry to stop mildew formation.
- Wrap cords loosely to avoid damage.
Empty the tanks and wipe down the machine before storing. This prevents stagnant water smells and bacteria growth.
Troubleshooting Common Issues After Reassembly
Reassembling a Bissell Carpet Cleaner often calls for a keen eye to ensure every part fits perfectly. Even so, post-reassembly issues like water leaks or brush roll problems can pop up. Let’s tackle these common hiccups and get your machine running smoothly.
Water Leakage Fixes
- Check O-Rings: Ensure the O-rings are intact and seated properly. Replace if worn out.
- Secure Tanks: Confirm that both the clean and dirty water tanks click into place. A loose tank can cause leaks.
- Tighten Connections: Inspect all hose connections. Tighten any loose fittings.
If leaks persist, examine the water flow indicator. A misaligned or blocked indicator can also lead to leakage.
Brush Roll Movement Solutions
| Problem | Solution |
|---|---|
| Brush Not Spinning | Reset the machine. Press the brush roll button to restart. |
| Obstruction | Remove the brush cover. Clear any debris entangling the brush roll. |
| Belt Issues | Check the belt. Replace if broken or stretched. |
Regular maintenance keeps the brush roll in top condition. Clean the brush roll frequently for optimal performance. By addressing these issues, your Bissell Carpet Cleaner should be ready to tackle dirt and stains once again.
Professional Services Vs. DIY
Deciding between professional services and doing it yourself can be tough. Cleaning your Bissell Carpet Cleaner is essential for its performance. Let’s explore the options.
When To Seek Professional Help
Complex issues with your Bissell Carpet Cleaner require professional expertise. Signs include:
- Unusual noises during operation
- Loss of suction or poor cleaning results
- Electrical problems, such as not turning on
Professionals offer deep cleaning and thorough maintenance, which extends your machine’s life.
Benefits Of DIY Maintenance
DIY maintenance saves money and gives you control over the cleaning process. Benefits include:
| Benefit | Explanation |
|---|---|
| Cost-Effective | Save on service fees |
| Convenience | Clean on your schedule |
| Knowledge Gain | Learn about your machine |
Regular DIY maintenance includes:
- Emptying and rinsing tanks
- Checking for clogs and removing debris
- Washing or replacing filters
Follow the user manual for step-by-step guidance.
Frequently Asked Questions
How Do You Clean The Inside Of A Bissell Carpet Cleaner?
Turn off and unplug the BISSELL carpet cleaner. Remove the tank, emptying and rinsing it with water. Wipe the machine’s interior with a damp cloth. Clean the nozzle with a soft brush, and let all parts air-dry before reassembling.
How To Take Apart A Bissell Proheat Carpet Cleaner?
Unplug the BISSELL Proheat cleaner. Remove the water tanks and unscrew the plastic screws. Detach the hose and nozzle. Carefully separate the main body for thorough cleaning or maintenance.
How Do You Deep Clean A Bissell Carpet?
To deep clean a BISSELL carpet, first vacuum thoroughly. Next, pre-treat stains using BISSELL cleaning formulas. Fill the machine with hot water and formula; then power on, and slowly pass over the carpet. Repeat as necessary, and let the carpet dry completely.
How To Clean A Bissell Proheat Powerbrush Carpet Cleaner?
Unplug the BISSELL Proheat Powerbrush and empty its tanks. Remove debris from the brush roll, rinse the nozzle, and clean the filter. Let all parts air-dry before reassembling.
Conclusion
Taking apart your Bissell carpet cleaner for a thorough clean doesn’t have to be daunting. With the right steps and a little patience, you can ensure your machine works efficiently for years to come. Remember, regular maintenance is key to pristine carpets and a happy home.
Keep your Bissell at its best, and it will keep your floors looking their best.


As an Amazon Associate, Cleanestor earns from qualifying purchases at no additional cost to you.
